Turning a Toshiba Laptop into a Photo Frame
I had an old Toshiba Portege M100 laptop which I wasn’t using, and recently decided to put it to good use: as a digital photo frame, and extra computer screen. It displays photos from a file server, automatically turns on and off, and can be used as an extra PC screen.
Building
The basic steps to turn this (or a similar) laptop into a photo frame are to take the screen and lid apart, rotate them round, and secure them to the other half of the laptop again.
Disassembly
The lightweight frame of Portege laptops makes them very easy to disassemble, as there is very little structure to the laptop; the case makes up most of the chassis.
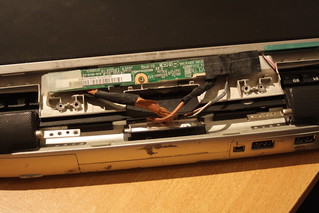
The front case of the screen is held in place with two screws, and is held around the edges, similar to most laptops. Once this is removed, the friction hinges holding the two parts together can be dismantled, detaching the two halves:

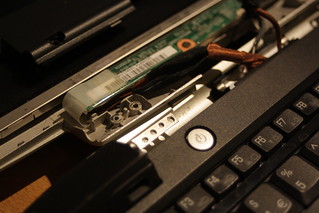
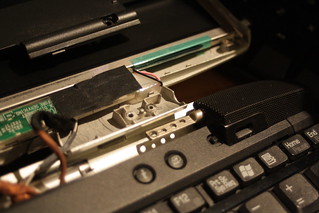
The wires here are quite fragile (the screen also has the bluetooth & wifi antennae and the status lights). The visible circuit is a high voltage light controller, so try not to damage it.
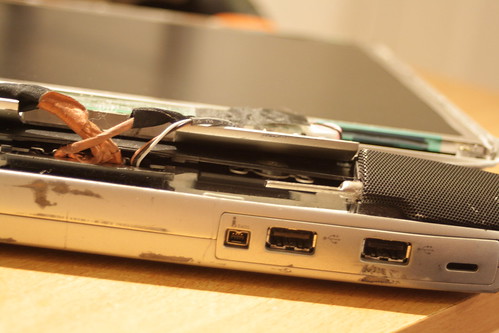
At this point, try turning the screen over, so it faces down onto the desk. This may require some disassembly of the main laptop body to loosen the cables, but if the screen can’t be turned over, then it is unlikely that the laptop can be made into a photo frame. If there are only a few cables stopping the screen from being turned, then you could try extending them at your own risk. See this episode of The Ben Heck Show for a warning on extending LCD cables.
Rotating the screen
Once the screen is facing downwards, for some laptops folding the lid over again will result in it being correctly orientated. For the Toshiba M100, part of the screen back has to be cut in the centre to make space for the cables (this laptop has an aluminium lid):
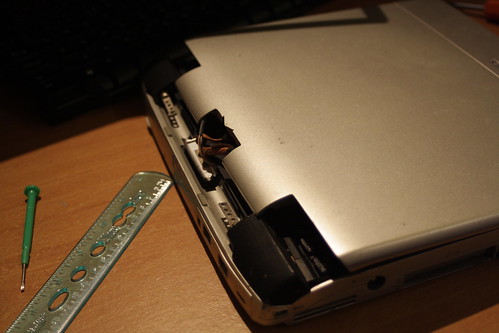
This makes space for the cables when the screen is repositioned:
At this point make sure that the laptop still boots and operates normally.
Fixing the screen
From this point onwards my laptop mod is not perfected, and the method used here to hold the screen is temporary, but does still work.
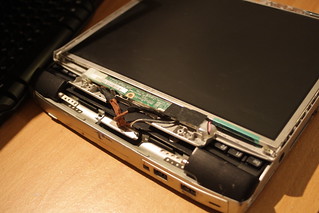
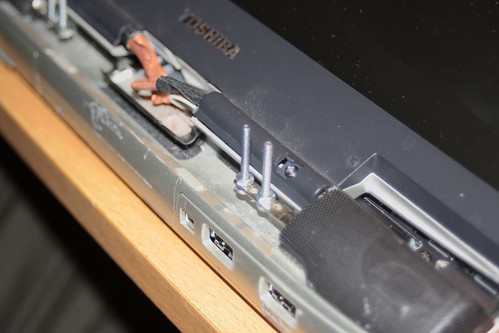
I put some 2mm machine screws and nuts through the hinges at the bottom of the screen to support it:
and simply used thick double-sided tape to attach the lid to the inside of the main body, either side of the mouse pad. This avoids the mouse buttons being pressed. At some point I will improve this method of attaching the lid & screen, as this is definitely not the best way. It has the current limitation of also hiding the power button:
Software
I installed Ubuntu on the laptop, as the Windows XP installation no longer worked. This allowed me to, as also as using it as a photo frame, use it as an extra desktop monitor to my computer.
Photo updating
My photos were stored on an Ubuntu Server on a Windows (samba) share. To access the photos mount the network share using Linux’s fstab. To make the screensaver activate when the laptop turns on, enable Automatic Login in ‘Login Screen’ settings. On your new photo frame, open up a terminal (Accessories->Terminal), then type:
sh mkdir Pictures/Photos sudo mkdir /media/photos sudo apt-get install smbfs
You may also want to install an SSH server for easier control of the photo frame
sh sudo apt-get install openssh-server
Everything is now installed, so the next step is to set up the access to the
photos. Edit the file /etc/fstab, by pressing Alt-F2 and typing gksu gedit
/etc/fstab or use the editor of your choice.
At the bottom of the file, add the line:
fstab //SERVERNAME/ShareName	/media/photos cifs
guest,uid=1000,iocharset=utf8,codepage=unicode,unicode  0  0
Replacing SERVERNAME and ShareName with correct settings for you. If the server always has the same IP address, use this in place of SERVERNAME. ### Syncing photos In a terminal again, type
sh export EDITOR=nano crontab -e
This will open a file. Scroll down to the bottom of it and paste this line into it, replacing USERNAME with your login name.
cron 10 * * * * rsync -r --delete-after /media/photos/ /home/USERNAME/Pictures/Photos
Now restart the laptop. It will connect to the remote computer, and each hour rsync will check for photos and copy them onto the laptop. The final step is to set the screensaver to the smallest time interval, and set it to the pictures screensaver. Then in Preferences->Power Management settings, set a suitable brightness and make sure that the screen won’t turn off.
Extra monitor
For me, the best use for this photo frame is as an extra monitor for a computer. This is achieved using a VNC server on the photo frame and the program x2vnc, which bridges mouse and keyboard movements between computers. On the laptop, open Preferences->Remote Desktop. Check ‘Allow other users to view your desktop’, uncheck ‘You must confirm each access to this machine’, and enter a password for the VNC remote desktop connection. Log out and log back in again.
On your main PC, install x2vnc:
sh sudo apt-get install x2vnc
Once it is installed, turn on the photo frame and make sure that they are
connected to the same network. Open a terminal on the main PC and run the
command x2vnc -east PHOTOFRAMEIP:0 -passwdfile ~/.photoframepass
Replace PHOTOFRAMEIP with the IP address of the photo frame. This can be found by running ‘ifconfig’ on the photo frame, and looking for the line that says ‘inet addr’ just underneath eth0 or wlan0. If the new screen is on the left of the PC, replace -east with -west.
This should, if all is set up correctly, should connect to the photo frame, showing a notification on it. For the first time it will ask for the password, but after that the login won’t need a password. To make the connection start automatically, add the line to a new entry in Preferences->Startup Applications, causing it to start when you log in.
Once connected, you should be able to move the mouse and use the keyboard seamlessly between the two computers, effectively giving you an extra monitor.